Here I’m going to show you how you can install a Ghost blog using AWS Lightsail, set up a CDN for high performance, and handle traffic spikes without a problem from $6 per month.
First, I’m assuming you are familiar with Ghost, just in case, it’s an open-source blogging platform. I like its architecture. It’s decoupled; therefore, removing the parts you are not interested in and replacing them is easy. From their official docs, these are the parts in the system:
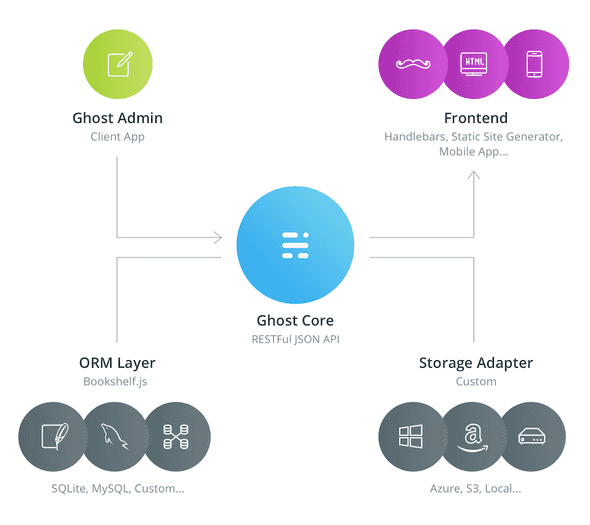
For simplicity in this post, I will focus on setting up all parts in a dedicated VPS instance in Amazon Lightsail. It is the easiest way to get started with AWS for developers. Lightsail provides developers with compute, storage, and networking capacity and capabilities to deploy and manage websites and web applications in the cloud. The pricing of these VPS is similar to a three year reserved EC2 instance without the commitment. It’s a competitor service to Digital Ocean.
1. Creating the VPS with Ghost Blog
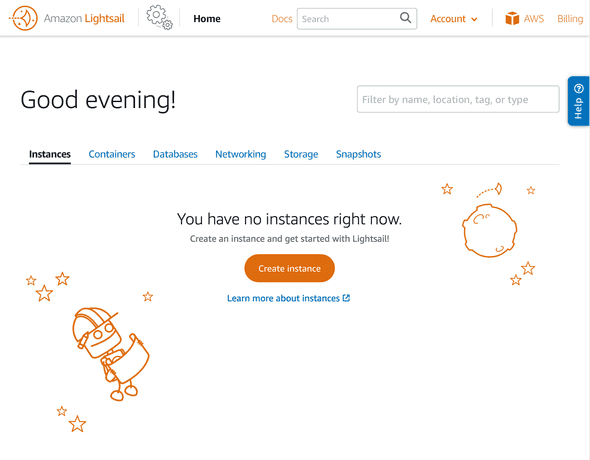
To create the server or instance as it’s called in the AWS ecosystem, navigate to AWS Lightsail, select the “Instances” tab, and click on “Create instance”.
In the next screen, you can select in which region you want to base your server. As the server’s type of operating system image, I choose a Linux server with Ghost and its dependencies installed by default. Bitnami creates the server image, and you can see the documentation for it on their website. As the default tech stack installed in the server, we have Apache HTTP server, Maria DB, Node.js and Ghost Blog.
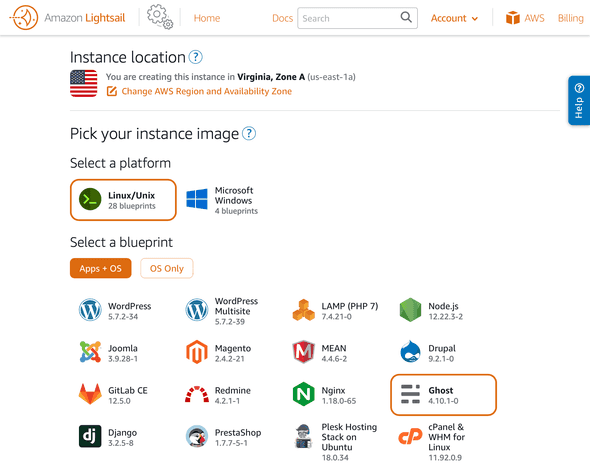
For this demo, I’m selecting the smallest VPS on offer. We are also adding a CDN in front of the primary server. You don’t need a larger instance unless you have many editors or other specific needs.
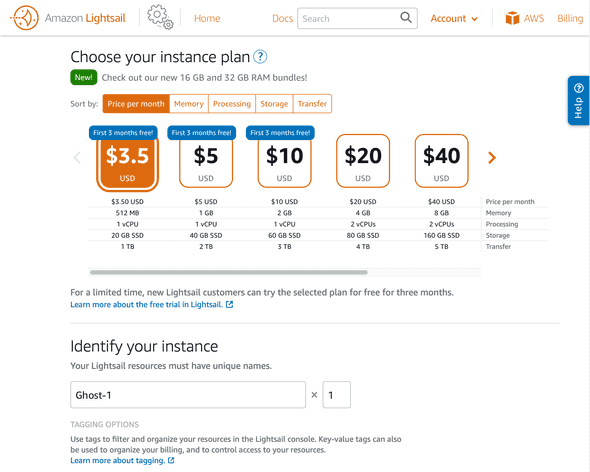
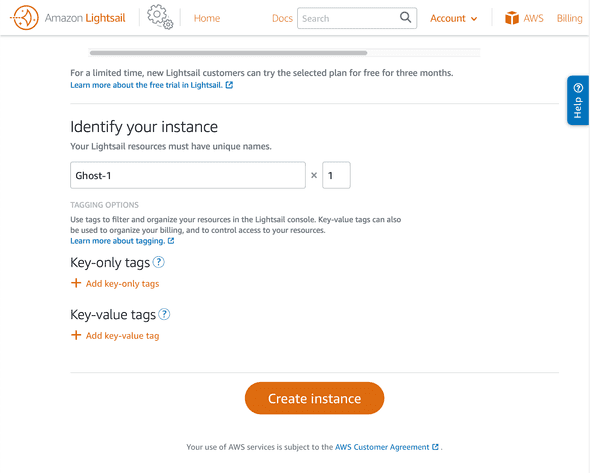
Scroll to the bottom of the page and click on “Create instance”.
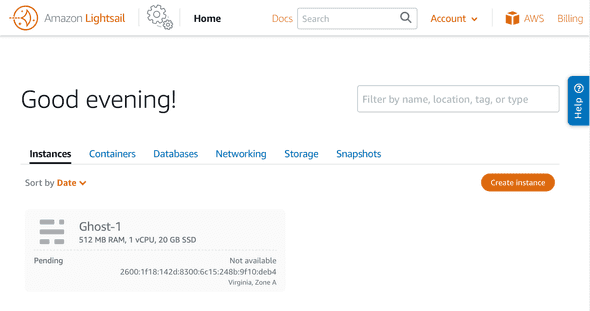
You will see that the new instance is being created.
And after a few minutes, you will see it’s in the “running” state. Click on the instance name to navigate to the details.
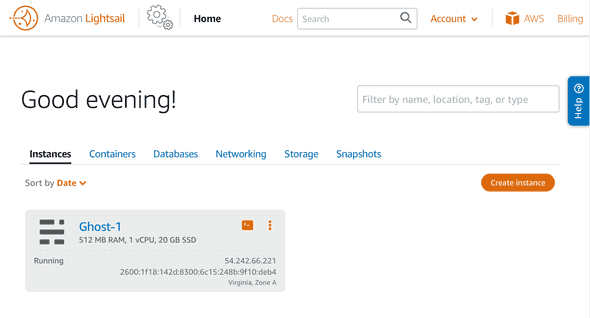
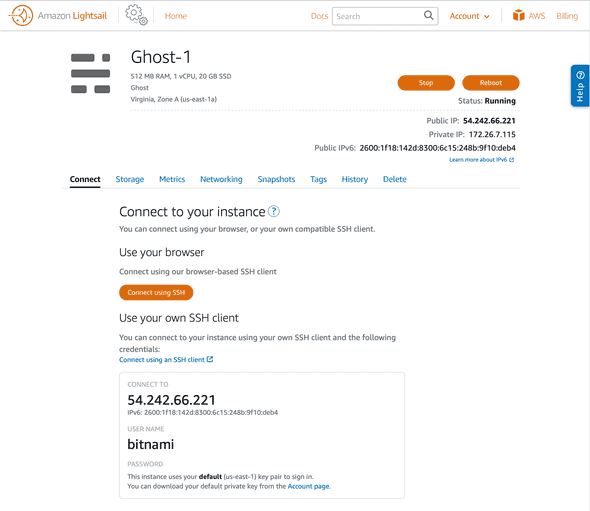
In this screen, you can see the public IP, and you can also connect to the VPS using SSH from the website, so you don’t need to use your terminal or putty to connect to the instance. Go ahead and click on “Connect using SSH” so we can find out the logging details for the Ghost admin panel.
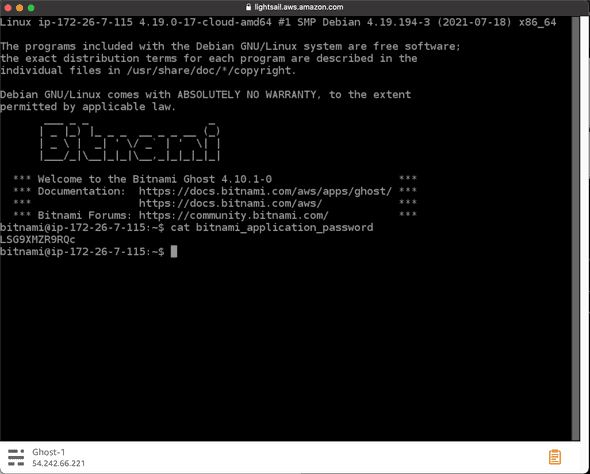
Once you are in the terminal, you just need to type cat bitnami_application_password and that will show your access password. The default user is [email protected].
Now you can open the default homepage by navigating to http://PUBLIC_IP. In my case, that is http://54.242.66.221.

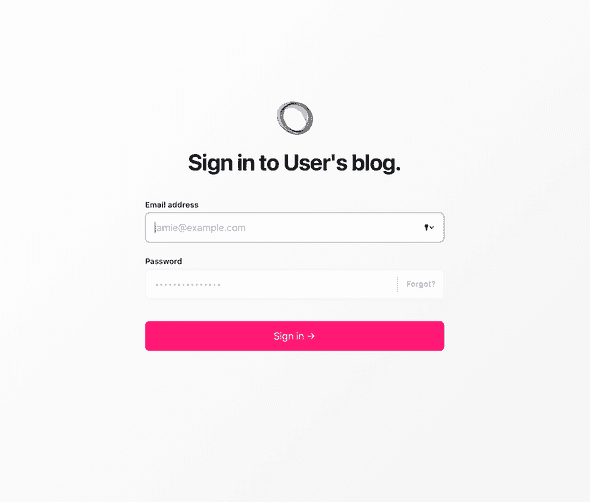
Now you can open the admin panel by navigating to http://PUBLIC_IP/ghost. In my case, that is http://54.242.66.221/ghost, and enter your credentials to log in.
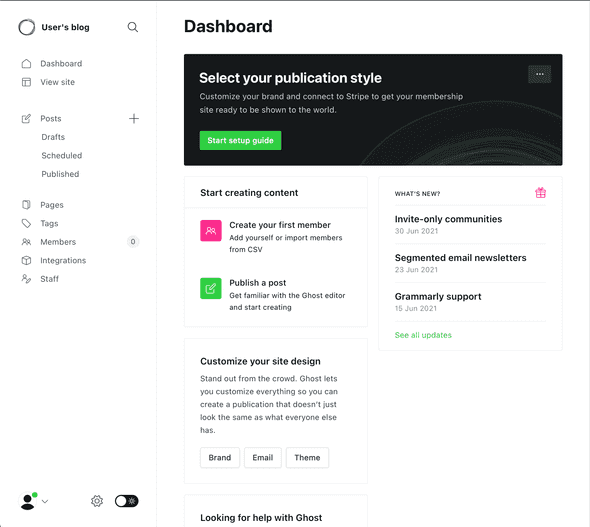
Once you are logged in to the dashboard, you can edit, delete or create new content in pages and blog posts. And change settings or configure integrations for your blog.
2. Configure Email
In Ghost, you can send two types of email:
- Transactional: user invitations, password resets, member signup and member login links.
- Newsletters to your subscribers: only supports Mailgun to send emails in bulk to guarantee deliverability. There are workarounds to use other email providers too. You can find more details about the reasons behind using Mailgun.
By default, Ghost uses Nodemailer to send emails. And by default, Sendmail is the transport layer, but it’s not installed on our server. I recommend you use an external SMTP server for a higher deliverability rate. It can be AWS SES, Gmail, or Mailgun if you are interested in using the Newsletters feature as well.
To update the email configuration details, connect via SSH to the server again. The ghost configuration file location path is /opt/bitnami/ghost/config.production.json
You can edit it using your favourite text editor, I will use VI. Type the command $ vi /opt/bitnami/ghost/config.production.json, and find the lines:
  "mail": {
    "transport": "Direct"
  },
If you want to use Gmail, you can replace the previous 3 lines, with the following code block, replacing your user/password:
  "mail": {
    "service": 'Gmail',
    "transport": 'SMTP',
    "options": {
      "host": 'smtp.gmail.com',
      "port": 465,
      "secureConnection": true,
      "auth": {
        "user": '[email protected]',
        "password": 'XXXXXXXXX'
      }
    }
  }
If you are using Mailgun, then use the following code-snipet, replacing your user/password:
  "mail": {
    "transport": "SMTP",
    "options": {
      "service": "Mailgun",
      "host": "smtp.mailgun.org",
      "port": 587,
      "auth": {
        "user": "[email protected]",
        "pass": "d995a43582a6bcff242c67de755df5e1"
      }
    }
  },
You can get your Mailgun config details from the dashboard after you have logged in to your account:
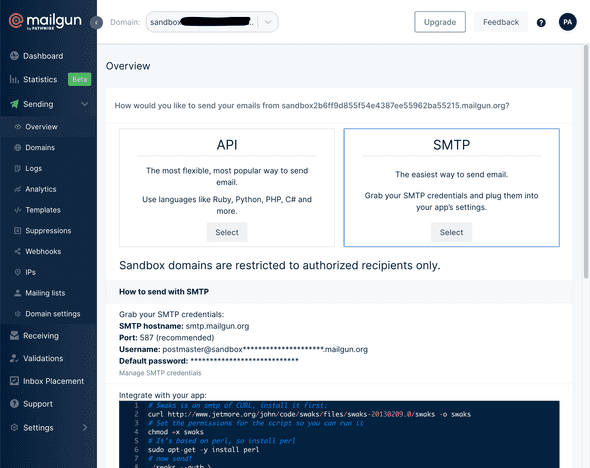
After you have updated your email configuration details, restart Ghot by running in your server console sudo /opt/bitnami/ctlscript.sh restart ghost.
3. Configuration for Email Newsletters
To start sending out bulk emails, you will need to provide your Mailgun API key to Ghost. Navigate to the Mailgun dashboard, select API Keys, and copy the key. Then in your Ghost admin dashboard, go to Settings -> Email newsletter -> Email newsletter settings and click on expand. Paste the Mailgun Domain and Mailgun API key.
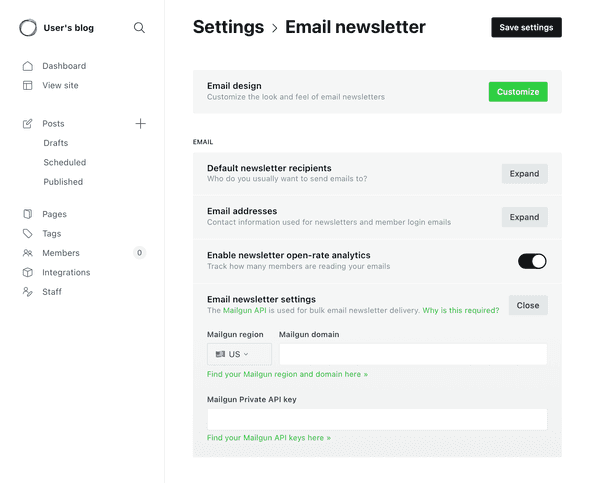
That is all you need to send out newsletters and transactional emails from your Ghost blog. To test that sending emails work, you can select Stuff from the Ghost dashboard menu, then in the top right, click on Invite people, to try to send emails through Ghost.
4. Add a CDN for Increased Speed and Low Latency
CDNs offer an easy way to increase the speed of a website while also lowering the latency. Therefore, they are essential for the fast, efficient and secure delivery of content to worldwide users. With website visitor attention spans growing shorter by the day, delivering this content as quickly as possible is imperative.
Up until this point, we have accessed the server always via its static IP. Once we create our CDN, we will have a domain name. And traffic to the CDN will be over HTTPS, and the CDN will act as a reverse proxy that will communicate to our server using HTTP. Luckily we can host Ghost behind a reverse proxy without a problem, but we need to pass a few additional headers to avoid getting inside an infinite loop where Ghost thinks that we’re not using SSL. We’re going to set up as part of this configuration.
To create the CDN, from your Lightsail dashboard, navigate to the Networking tab, and click on Create distribution:
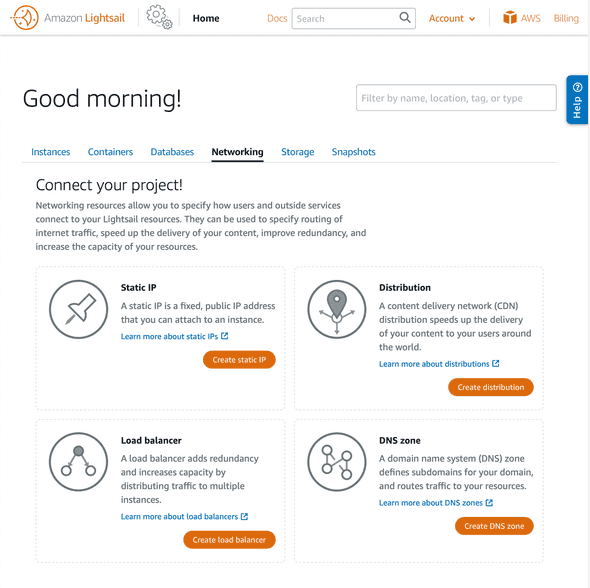
In this form, we configure how we want the CDN to behave, to start with, I’m selecting the Ghost server as origin. That means that the traffic that the CDN will route the traffic to Ghost and it will cache it.
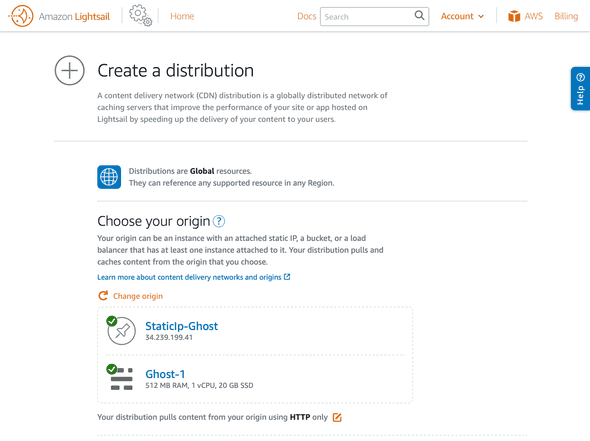
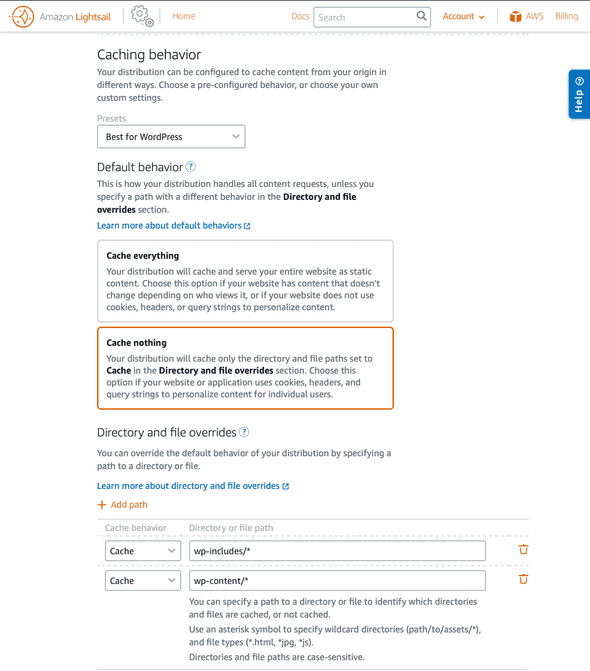
If we scroll down to the Caching behaviour section, select the option Best for WordPress, then click on the link Show all settings. Go to Directory and files overrides section, and you can delete those two caching behaviours for the folders “wp-includes” and “wp-content”. You can do that by clicking on the bin icon to the right. I am interested in the Advanced cache settings section below, but I couldn’t find any other way to access it. Maybe this is fixed in a future update.
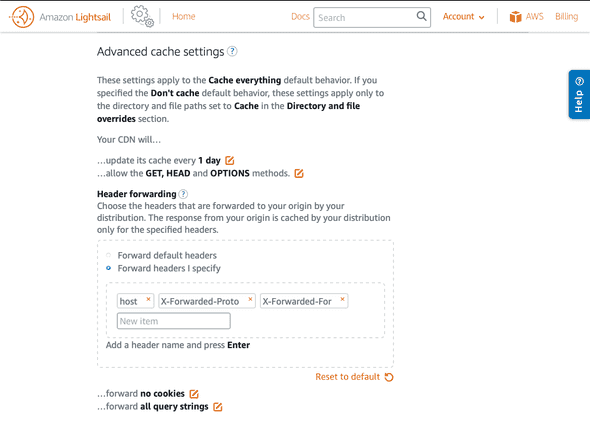
Now, click on the edit button next to “…forward the HTTP headers I specify” section. And add the options X-Forwarded-Proto / X-Forwarded-For, as shown in the screenshot below. As mentioned below, we’re passing these headers to not get into an SSL redirect loop.
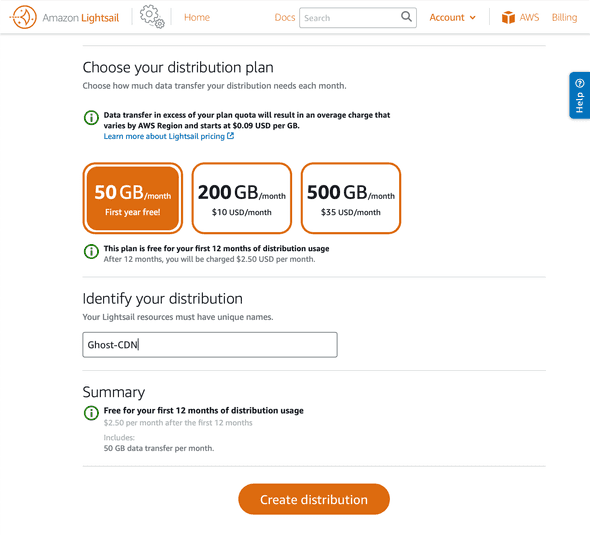
Keep scrolling down, to give a name to the CDN distribution, and click on Create distribution to finish.
You will be redirected to the CDN details screen, where you can see that it’s being created on the top right. It normally takes 5 to 10 minutes.
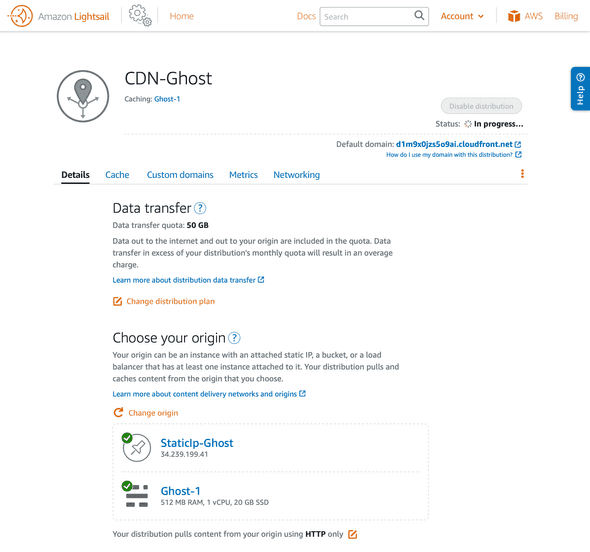
Notice that we’re also getting a domain name for the distribution in the form of “https://.cloudfront.net”. So we need to update Ghost to recognize that host as the domain for the blog. Connect via SSH into the server, edit your config.production.json “and in the line where the public URL for the blog is specified, enter your CDN public URL, in the form **“https://.cloudfront.net”**. Later, after we set up a custom domain name, we will update it again.
Enable SSL
We’re enforcing HTTPS from the CDN; we also need to edit Apache’s configuration to pass the headers specified earlier in the CDN. Edit the Apache’s configuration file by running the command in the server terminal:
sudo vi /opt/bitnami/apache2/conf/httpd.confFind the block RequestHeader set X-Forwarded-Proto "https", as shown below:
<IfModule headers_module>
    #
    # Avoid passing HTTP_PROXY environment to CGI's on this or any proxied
    # backend servers which have lingering "httpoxy" defects.
    # 'Proxy' request header is undefined by the IETF, not listed by IANA
    #
    RequestHeader unset Proxy early
    RequestHeader set X-Forwarded-Proto "https"
</IfModule>
After updating the domain and SSL config, remember to restart Ghost and Apache:
sudo /opt/bitnami/ctlscript.sh restart ghost
sudo /opt/bitnami/ctlscript.sh restart apache
Now you can navigate to your blog and admin panel using your CloudFront domain name.
5. Use a Custom Domain Name
The next step after having the CDN created is to use my domain name. To set it up, from the Lightsail dashboard, select the Networking tab, then click on your CDN-Ghost distribution, and select the ”Custom domains” tab.
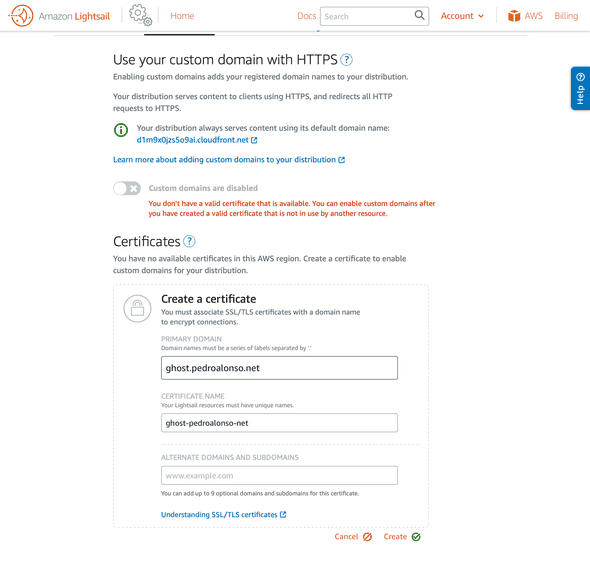
As you can see, the toggle to enable my custom domain is disabled because I don’t have a valid SSL certificate, and I’m enforcing SSL traffic through the CDN. So I will create a certificate by entering the domain name that I want to use, giving it a name, and clicking on the Create button.
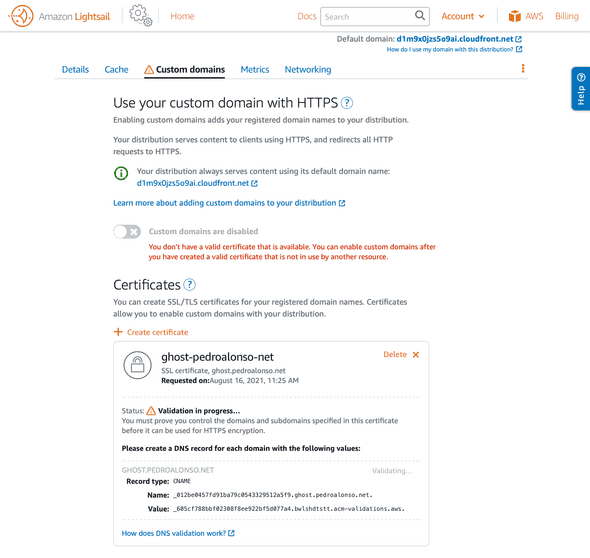
We need to validate that we own the domain name, so we need to add an entry to the DNS table. That might differ depending on which domain provider you have, but it’s pretty standard, and you need to add a CNAME entry, as is shown in the screenshot.
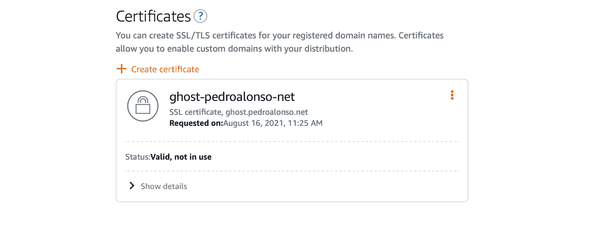
After you create the CNAME entry, the domain will be valid but not in use.
So we can associate the custom domain to the CDN now. Lastly, don’t forget to create another CNAME entry from the domain name to CloudFront. In my case, it’d be something like:
ghost.pedroalonso.net CNAME ********.cloudfront.net
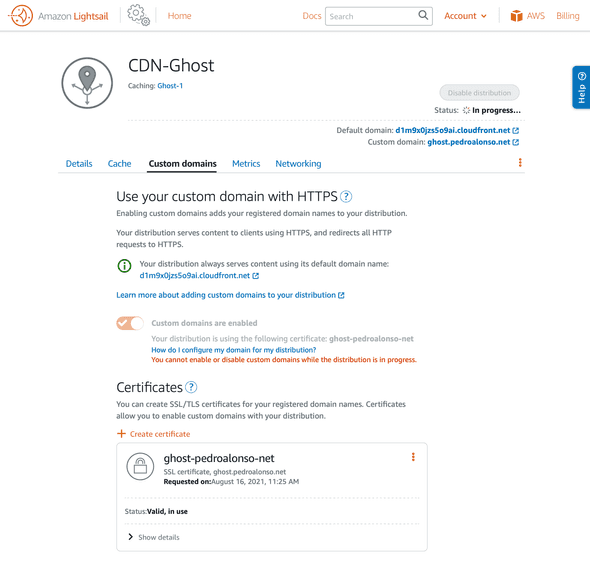
Now I can navigate to my self-hosted Ghost blog using my custom domain, using HTTPS and having a CDN in case any blog post becomes viral; it can cope with the load successfully!
6. Ghost Integrations
At this point, probably you will want to set up some analytics, i.e., Google Analytics or Matomo. Also, you might be interested in hearing feedback in the form of comments from your readers; it’s easy to integrate Disqus in Ghost.
I would also like to mention that there are many integrations with 3rd party websites by default in the Ghost editor. So you can use images from Unsplash for your posts very quickly. It’s also effortless to embed videos from YouTube or Tweets from Twitter. You can also embed PayPal Payment Buttons or even custom HTML. So if you want to do something not supported by default, look at the extensive list of integrations.


