Redis Queues and Pub/Sub in Next.js - A Practical Guide
1. Introduction
Redis is often described as a “data structure server” - and for good reason. While many developers know Redis as a caching layer, its built-in data structures like lists and pub/sub channels make it incredibly powerful for real-time messaging, job queues, and event-driven architectures.
1.1 Why Redis for Queues and Messaging?
Unlike database-based solutions, Redis operates entirely in memory, making it blazingly fast for queue operations. A typical job queue operation in Redis takes microseconds, while database polling might take milliseconds. When you’re processing thousands of jobs per minute, this difference matters.
Redis shines in three key areas:
- Job Queues: Using lists (LPUSH/RPOP) for simple, reliable work queues
- Pub/Sub: Real-time messaging between services and clients
- Complex Patterns: Combining these primitives for sophisticated workflows
If you’re building features like real-time notifications, background job processing, or event-driven architectures, Redis provides simple yet powerful primitives. And unlike adding another service to your stack, Redis is often already available in your infrastructure for caching.
2. Redis Lists as Job Queues
At its core, a Redis list is a linked list of strings. But by using LPUSH (left push) and RPOP (right pop), we create a simple FIFO queue. This pattern is so common that many production systems start with it before graduating to more sophisticated queue libraries.
2.1 Understanding Redis Lists
Redis lists support operations at both ends, making them perfect for queue implementations:
Click to zoom
import { createClient } from 'redis'
const client = createClient({ url: process.env.REDIS_URL || 'redis://localhost:6379'})
await client.connect()
// Add job to queue (push to left)await client.lPush('jobs:email', JSON.stringify({ type: 'welcome-email', data: { name: 'John' }}))
// Process job from queue (pop from right)const job = await client.rPop('jobs:email')if (job) { const parsed = JSON.parse(job) await processEmailJob(parsed)}The beauty of this approach lies in its simplicity. LPUSH adds items to the “head” of the list, while RPOP removes from the “tail” - creating a perfect FIFO queue. Multiple workers can safely call RPOP; Redis handles the atomicity.
2.2 Building a Simple Job Queue
Let’s build a practical job queue system using Redis lists:
import { createClient } from 'redis'
const client = createClient({  url: process.env.REDIS_URL})
client.on('error', err => console.error('Redis Client Error', err))await client.connect()
export class JobQueue {  constructor(private queueName: string) {}
  // Add job to queue  async addJob(type: string, payload: any) {    const job = {      id: crypto.randomUUID(),      type,      payload,      createdAt: Date.now()    }
    await client.lPush(this.queueName, JSON.stringify(job))    return job.id  }
  // Process jobs with blocking pop  async processJobs(handlers: Record<string, Function>) {    while (true) {      try {        // BRPOP blocks until a job is available (timeout: 5 seconds)        const result = await client.brPop(this.queueName, 5)
        if (!result) continue
        const job = JSON.parse(result.element)        const handler = handlers[job.type]
        if (!handler) {          console.error(`No handler for job type: ${job.type}`)          continue        }
        await handler(job.payload)        console.log(`Processed job ${job.id}`)
      } catch (error) {        console.error('Job processing error:', error)        await new Promise(resolve => setTimeout(resolve, 1000))      }    }  }
  // Get queue length  async length() {    return client.lLen(this.queueName)  }}
The key improvement here is using BRPOP instead of RPOP. The blocking variant waits for items to appear, eliminating the need for polling loops. Your worker process sleeps until a job arrives - no CPU waste, instant processing.
2.3 Using the Job Queue
Here’s how to integrate this into your Next.js application:
import { JobQueue } from '../redis/jobQueue'
const emailQueue = new JobQueue('jobs:email')
// Define handlersconst handlers = {  'welcome-email': async (payload: any) => {    console.log('Sending welcome email to:', payload.email)    await sendEmail({      to: payload.email,      subject: 'Welcome!',      template: 'welcome',      data: payload.data    })  },
  'password-reset': async (payload: any) => {    console.log('Sending password reset to:', payload.email)    await sendEmail({      to: payload.email,      subject: 'Reset your password',      template: 'password-reset',      data: { resetToken: payload.token }    })  }}
// Start processing (in worker process)export async function startEmailWorker() {  console.log('Email worker starting...')  await emailQueue.processJobs(handlers)}
// Add jobs (in API routes)export async function queueWelcomeEmail(email: string, data: any) {  return emailQueue.addJob('welcome-email', { email, data })}
Usage in an API route:
import { queueWelcomeEmail } from '@/lib/jobs/emailQueue'
export default async function handler(req, res) {  const { email, name } = req.body
  // Create user...
  // Queue welcome email (non-blocking)  await queueWelcomeEmail(email, { name })
  res.status(200).json({ message: 'User created' })}
2.4 Adding Reliability with Dead Letter Queues
Jobs can fail. Networks timeout, APIs go down, or data might be invalid. Rather than losing failed jobs, we’ll implement a dead letter queue - a separate queue that captures failed jobs for later inspection and retry.
export class ReliableJobQueue extends JobQueue {  private dlqName: string
  constructor(queueName: string) {    super(queueName)    this.dlqName = `${queueName}:dlq`  }
  async processJobs(handlers: Record<string, Function>) {    while (true) {      const result = await client.brPop(this.queueName, 5)      if (!result) continue
      const job = JSON.parse(result.element)
      try {        const handler = handlers[job.type]        if (!handler) throw new Error(`No handler: ${job.type}`)
        await handler(job.payload)        console.log(`✓ Processed job ${job.id}`)
      } catch (error) {        console.error(`✗ Job ${job.id} failed:`, error.message)
        // Add to dead letter queue with error info        await client.lPush(this.dlqName, JSON.stringify({          ...job,          error: error.message,          failedAt: Date.now()        }))      }    }  }
  // Inspect failed jobs  async getFailedJobs(limit = 10) {    const jobs = await client.lRange(this.dlqName, 0, limit - 1)    return jobs.map(j => JSON.parse(j))  }
  // Retry a failed job  async retryJob(jobId: string) {    const jobs = await this.getFailedJobs(1000)    const job = jobs.find(j => j.id === jobId)
    if (!job) throw new Error('Job not found in DLQ')
    // Remove from DLQ    await client.lRem(this.dlqName, 1, JSON.stringify(job))
    // Add back to main queue    await client.lPush(this.queueName, JSON.stringify({      id: job.id,      type: job.type,      payload: job.payload,      createdAt: Date.now(),      retryCount: (job.retryCount || 0) + 1    }))  }}
This pattern is production-ready for moderate workloads. For more sophisticated retry logic with exponential backoff and automatic retries, libraries like BullMQ (which we covered in Background Jobs Part 2) build on these same Redis primitives.
3. Redis Pub/Sub for Real-Time Messaging
While lists work great for job queues, Redis pub/sub excels at broadcasting messages to multiple subscribers. Think of it like a radio station - publishers broadcast on channels, and any number of subscribers can tune in.
3.1 Understanding Pub/Sub Fundamentals
Redis pub/sub operates on a simple model:
Click to zoom
import { createClient } from 'redis'
// Create separate clients for pub and subconst publisher = createClient({ url: process.env.REDIS_URL })const subscriber = createClient({ url: process.env.REDIS_URL })
await publisher.connect()await subscriber.connect()
// Subscribe to a channelawait subscriber.subscribe('notifications', (message) => {  console.log('Received:', message)})
// Publish to a channelawait publisher.publish('notifications', JSON.stringify({  type: 'new-order',  orderId: '12345'}))
The key difference from queues: with pub/sub, messages are broadcast to all active subscribers. If no one is listening, the message disappears. This “fire and forget” model is perfect for real-time updates but not for critical tasks that must be processed.
3.2 Building a Real-Time Notification System
Let’s build a practical notification system using Redis pub/sub:
import { createClient } from 'redis'
class NotificationPubSub {  private publisher: any  private subscriber: any  private handlers: Map<string, Set<Function>> = new Map()
  async initialize() {    this.publisher = createClient({ url: process.env.REDIS_URL })    this.subscriber = createClient({ url: process.env.REDIS_URL })
    await this.publisher.connect()    await this.subscriber.connect()  }
  // Subscribe to notification type  async subscribe(type: string, handler: Function) {    if (!this.handlers.has(type)) {      this.handlers.set(type, new Set())
      // Subscribe to Redis channel      await this.subscriber.subscribe(type, (message) => {        const data = JSON.parse(message)        const handlers = this.handlers.get(type)        handlers?.forEach(h => h(data))      })    }
    this.handlers.get(type)?.add(handler)  }
  // Unsubscribe handler  async unsubscribe(type: string, handler: Function) {    const handlers = this.handlers.get(type)    handlers?.delete(handler)
    if (handlers?.size === 0) {      await this.subscriber.unsubscribe(type)      this.handlers.delete(type)    }  }
  // Publish notification  async publish(type: string, data: any) {    await this.publisher.publish(type, JSON.stringify({      ...data,      timestamp: Date.now()    }))  }}
export const notificationBus = new NotificationPubSub()
3.3 Integrating with Next.js API Routes
Here’s how to use this in a real application:
import { notificationBus } from '@/lib/notifications/pubsub'
export default async function handler(req, res) {  const order = await createOrder(req.body)
  // Notify all interested services  await notificationBus.publish('order:created', {    orderId: order.id,    userId: order.userId,    total: order.total  })
  res.status(200).json(order)}
Multiple services can react to this event:
await notificationBus.subscribe('order:created', async (data) => {  await sendOrderConfirmationEmail(data.userId, data.orderId)})
// services/analyticsService.tsawait notificationBus.subscribe('order:created', async (data) => {  await trackOrderCreated(data)})
// services/inventoryService.tsawait notificationBus.subscribe('order:created', async (data) => {  await updateInventory(data.orderId)})
This decoupled architecture lets you add new features without modifying existing code. Need to send a Slack notification when orders are created? Just add another subscriber.
3.4 Pattern Matching with Pub/Sub
Redis pub/sub supports pattern-based subscriptions, enabling powerful routing patterns:
// Subscribe to all user eventsawait subscriber.pSubscribe('user:*', (message, channel) => {  console.log(`User event on ${channel}:`, message)})
// This will match 'user:created', 'user:updated', 'user:deleted'await publisher.publish('user:created', JSON.stringify({ userId: '123' }))await publisher.publish('user:updated', JSON.stringify({ userId: '123' }))
// Subscribe to multiple patternsawait subscriber.pSubscribe('order:*', handleOrderEvents)await subscriber.pSubscribe('payment:*', handlePaymentEvents)await subscriber.pSubscribe('user:*', handleUserEvents)
Pattern subscriptions let you build flexible event-driven architectures. A logging service might subscribe to *:* to capture all events, while specific services subscribe to their domains.
4. Combining Queues and Pub/Sub
The real power emerges when you combine these patterns. Pub/sub broadcasts events, while queues ensure work gets done. Let’s build a system that uses both.
4.1 Event-Driven Architecture Pattern
Here’s a pattern that broadcasts events while ensuring reliable processing:
Event-Driven Architecture with Redis
Click to zoom
import { createClient } from 'redis'
class EventQueue {  private publisher: any  private queueClient: any
  async initialize() {    this.publisher = createClient({ url: process.env.REDIS_URL })    this.queueClient = createClient({ url: process.env.REDIS_URL })
    await this.publisher.connect()    await this.queueClient.connect()  }
  // Emit event: broadcast + queue for processing  async emit(eventType: string, data: any) {    const event = {      id: crypto.randomUUID(),      type: eventType,      data,      timestamp: Date.now()    }
    // Broadcast to real-time subscribers    await this.publisher.publish(`event:${eventType}`, JSON.stringify(event))
    // Queue for reliable processing    await this.queueClient.lPush(`queue:${eventType}`, JSON.stringify(event))
    return event.id  }
  // Process queued events  async processEvents(eventType: string, handler: Function) {    const queueName = `queue:${eventType}`
    while (true) {      const result = await this.queueClient.brPop(queueName, 5)      if (!result) continue
      const event = JSON.parse(result.element)
      try {        await handler(event.data)      } catch (error) {        // Add to DLQ        await this.queueClient.lPush(          `dlq:${eventType}`,          JSON.stringify({ ...event, error: error.message })        )      }    }  }
  // Listen to real-time events (pub/sub)  async subscribe(eventType: string, handler: Function) {    const subscriber = this.publisher.duplicate()    await subscriber.connect()
    await subscriber.subscribe(`event:${eventType}`, (message) => {      const event = JSON.parse(message)      handler(event.data)    })  }}
export const eventQueue = new EventQueue()
4.2 Practical Use Case: Order Processing
Here’s how this hybrid pattern works in practice:
import { eventQueue } from '@/lib/eventQueue/hybrid'
// Initializeawait eventQueue.initialize()
// When an order is createdexport async function createOrder(orderData: any) {  const order = await db.order.create({ data: orderData })
  // Emit event (broadcasts + queues)  await eventQueue.emit('order.created', {    orderId: order.id,    userId: order.userId,    items: order.items,    total: order.total  })
  return order}
// Real-time UI updates (pub/sub - fast, no guarantee)await eventQueue.subscribe('order.created', async (data) => {  // Update dashboards, send WebSocket to connected clients  await broadcastToAdminDashboard(data)})
// Critical processing (queue - reliable, guaranteed)await eventQueue.processEvents('order.created', async (data) => {  // Must complete: send confirmation email, update inventory  await sendOrderConfirmation(data.userId, data.orderId)  await updateInventoryLevels(data.items)  await createInvoice(data.orderId)})
This pattern gives you the best of both worlds: real-time updates via pub/sub for UI responsiveness, and reliable queues for critical business logic. If the email service is down when an order is created, the pub/sub notification might be missed, but the queued job will wait and retry.
4.3 Building a Real-Time Dashboard with WebSockets
Let’s combine Redis pub/sub with Next.js WebSockets for live dashboard updates:
import { Server } from 'socket.io'import { eventQueue } from '@/lib/eventQueue/hybrid'
export default async function handler(req, res) {  if (res.socket.server.io) {    res.end()    return  }
  const io = new Server(res.socket.server)  res.socket.server.io = io
  // Initialize event queue  await eventQueue.initialize()
  // Subscribe to various events and broadcast to WebSocket clients  await eventQueue.subscribe('order.created', (data) => {    io.emit('order:new', data)  })
  await eventQueue.subscribe('user.signup', (data) => {    io.emit('user:new', data)  })
  await eventQueue.subscribe('payment.completed', (data) => {    io.emit('payment:success', data)  })
  io.on('connection', (socket) => {    console.log('Dashboard client connected')
    socket.on('disconnect', () => {      console.log('Dashboard client disconnected')    })  })
  res.end()}
Client-side dashboard:
'use client'
import { useEffect, useState } from 'react'import io from 'socket.io-client'
export function Dashboard() {  const [recentOrders, setRecentOrders] = useState([])
  useEffect(() => {    // Connect to WebSocket    const socket = io()
    socket.on('order:new', (order) => {      setRecentOrders(prev => [order, ...prev].slice(0, 10))      // Show toast notification      toast.success(`New order: $${order.total}`)    })
    socket.on('user:new', (user) => {      toast.info(`New signup: ${user.email}`)    })
    return () => socket.disconnect()  }, [])
  return (    <div>      <h2>Real-Time Orders</h2>      {recentOrders.map(order => (        <div key={order.orderId}>          Order #{order.orderId} - ${order.total}        </div>      ))}    </div>  )}
Now your dashboard updates instantly when events occur anywhere in your system. The Redis pub/sub acts as a message bus, decoupling event producers from consumers.
5. Production Considerations
Before deploying Redis-based queues and pub/sub to production, there are several important considerations to keep in mind.
5.1 Understanding Redis Persistence
Redis operates in-memory, which is what makes it blazingly fast. But this raises an important question: what happens when your server crashes or restarts? By default, you could lose everything.
Redis offers two persistence mechanisms:
Redis Persistence Mechanisms
Click to zoom
RDB (Redis Database Backup):
- Creates point-in-time snapshots at intervals
- Compact, single-file backups
- Fast restarts (loads binary snapshot)
- Can lose data between snapshots (if crash happens between saves)
AOF (Append Only File):
- Logs every write operation as it happens
- More durable (configurable sync: every second or every write)
- Larger files, slower restarts (replays all commands)
- Can recover almost all data (loses at most 1 second with
everysec)
For job queues, here’s what you need to know:
# redis.conf configuration
# Option 1: RDB only - Simple, fast, some data loss risksave 60 1000  # Save snapshot every 60 seconds if at least 1000 keys changedsave 300 100  # Or every 5 minutes if 100 keys changedsave 900 1    # Or every 15 minutes if 1 key changed
# Option 2: AOF only - Maximum durabilityappendonly yesappendfsync everysec  # Options: always (slowest, safest), everysec (balanced), no (fastest, least safe)
# Option 3: Both (Recommended for production queues)save 900 1appendonly yesappendfsync everysec
The tradeoff matrix:
| Configuration | Speed | Durability | Best For |
|---|---|---|---|
| RDB only | ⚡⚡⚡ Fast | ⚠️ Minutes of data loss | Caches, non-critical queues |
| AOF everysec | ⚡⚡ Good | ✅ ~1 second loss | Most production queues |
| AOF always | ⚡ Slower | ✅✅ No loss | Financial transactions, critical jobs |
| Both | ⚡⚡ Good | ✅✅ ~1 second loss | Production recommended |
Important: Pub/sub messages are never persisted. If no one is listening when a message is published, it’s gone. This is by design - pub/sub is for real-time, ephemeral messaging. For critical messages that must be delivered, use lists (queues) instead.
5.2 Redis in Serverless (Vercel, Cloudflare Workers)
Serverless platforms like Vercel and Cloudflare Workers bring unique challenges for Redis:
The Challenge: Serverless functions are stateless and short-lived. You can’t run a persistent worker process doing BRPOP on a queue. Each function invocation is independent.
Here’s the architecture challenge visualized:
Serverless Architecture Pattern
Click to zoom
Solutions:
- Upstash Redis (Serverless-native):
// Works perfectly with Vercel/Cloudflareimport { Redis } from '@upstash/redis'
const redis = new Redis({  url: process.env.UPSTASH_REDIS_REST_URL,  token: process.env.UPSTASH_REDIS_REST_TOKEN,})
// HTTP-based, no persistent connections neededawait redis.lpush('jobs', JSON.stringify(job))
Upstash uses HTTP REST API instead of TCP connections, making it perfect for Edge Runtime and serverless platforms. It has a generous free tier and global edge caching.
- Traditional Redis (Requires TCP connection, not for Edge):
// Only works in Node.js runtime, not Edgeimport { createClient } from 'redis'
const client = createClient({ url: process.env.REDIS_CLOUD_URL})- Hybrid Architecture (Recommended):
- Serverless functions add jobs to Redis
- Separate worker service (Railway, Render, Fly.io) processes them
// Vercel API Route: Add job only (Edge compatible)export const config = { runtime: 'edge' }
export default async function handler(req: Request) {  await redis.lpush('jobs:email', JSON.stringify({    email: req.body.email,    type: 'welcome'  }))
  return Response.json({ queued: true })}
// Separate worker on Railway/Render/VPS: Process jobsasync function worker() {  const redis = createClient({ url: process.env.REDIS_URL })  await redis.connect()
  while (true) {    const result = await redis.brPop('jobs:email', 5)    if (result) {      const job = JSON.parse(result.element)      await processEmailJob(job)    }  }}
Platform-Specific Notes:
- Vercel: Use Upstash for Edge Runtime, or Node.js runtime with traditional Redis. Deploy workers separately.
- Cloudflare Workers: Must use HTTP-based solutions like Upstash. Or use Cloudflare’s native Queues feature.
- AWS Lambda: Can use traditional Redis with VPC configuration, or Upstash for simpler setup.
Cloudflare Workers Queues: Cloudflare has its own queuing system that works natively with Workers - no Redis needed for basic queuing:
// Native Cloudflare Queues (no Redis needed)export default { async fetch(request: Request, env: Env) { await env.EMAIL_QUEUE.send({ type: 'welcome' }) return new Response('Queued') }}
### 5.3 Redis Licensing and Alternatives
In March 2024, Redis Ltd. changed its licensing from BSD (open source) to a dual-license model (Redis Source Available License v2 and Server Side Public License v1). This sparked significant controversy and led to the creation of several alternatives.
**What Changed**:- Redis 7.4+ is no longer open source- You can still use it freely for most applications- Restrictions mainly affect cloud providers offering Redis as a managed service- The license prevents competitors from offering Redis-as-a-Service
**This affects you if**:- You're building a managed Redis service (competing with Redis Cloud)- Your organization requires fully open-source software for compliance- You want to avoid vendor lock-in concerns
**This doesn't affect you if**:- You're using Redis internally in your applications (SaaS, web apps, etc.)- You're using managed services (they handle licensing)- You're self-hosting for your own use
**Open Source Alternatives**:
<Mermaid code={`graph TB R[Redis 7.2.4<br/>Last BSD version] --> V[Valkey<br/>Linux Foundation] R --> K[KeyDB<br/>Multi-threaded] R --> D[DragonflyDB<br/>Modern Rewrite] R --> G[Garnet<br/>Microsoft]`} caption="Redis Alternatives Family Tree" />
**1. Valkey** (Recommended - Linux Foundation):- Fork of Redis 7.2.4 (last BSD version)- Backed by AWS, Google Cloud, Oracle, Ericsson- 100% API compatible with Redis- BSD 3-Clause license (true open source)- Active development and community support
```bash# Dockerdocker run -p 6379:6379 valkey/valkey
# Works with existing Redis clientsimport { createClient } from 'redis'const client = createClient({ url: process.env.VALKEY_URL || 'redis://localhost:6379'})// No code changes needed!2. KeyDB (High Performance):
- Multi-threaded Redis alternative
- Better performance on multi-core systems
- BSD 3-Clause license
- Active replication support
3. DragonflyDB (Modern Architecture):
- Built from scratch with modern C++
- Claims 25x better throughput than Redis
- Multi-threaded, efficient memory usage
- BSL 1.1 license (source-available, becomes open after 4 years)
- Compatible with Redis API
4. Garnet (Microsoft):
- C# implementation by Microsoft Research
- Thread-scalable, cross-platform
- MIT license
- Redis protocol compatible
Managed Service Options:
| Service | Backing | License Handling | Serverless Support |
|---|---|---|---|
| Upstash | Redis | Managed by provider | ✅ Yes (HTTP) |
| AWS ElastiCache | Valkey/Redis | Switching to Valkey | ❌ No |
| Google Memorystore | Redis | Managed by provider | ❌ No |
| Azure Cache | Redis | Managed by provider | ❌ No |
| Railway | Self-hosted | Your choice | ❌ No |
Practical Recommendation:
// Write abstraction layer for easy switchinginterface QueueClient {  lpush(key: string, value: string): Promise<number>  brpop(key: string, timeout: number): Promise<any>  publish(channel: string, message: string): Promise<number>  subscribe(channel: string, callback: Function): Promise<void>}
// Implementation works with Redis, Valkey, KeyDB, etc.class RedisQueueClient implements QueueClient {  constructor(private client: any) {}
  async lpush(key: string, value: string) {    return this.client.lpush(key, value)  }
  // ... other methods}
// Switch backing service via environment variableconst client = createClient({  url: process.env.REDIS_URL // Can point to Redis, Valkey, etc.})
Migration Strategy:
- Current projects: Continue with Redis - license likely doesn’t affect you
- New projects: Consider Valkey for guaranteed open source
- Managed services: Use Upstash (serverless) or AWS ElastiCache (switching to Valkey)
- High performance needs: Evaluate DragonflyDB
- Future-proof: Use abstraction layer to enable easy switching
The good news: all major alternatives maintain Redis protocol compatibility, so switching is usually just a configuration change, not a code rewrite.
5.4 Connection Pooling and Management
Redis connections should be reused, not created per request:
import { createClient } from 'redis'
class RedisManager {  private static publisher: any  private static subscriber: any  private static queue: any
  static async getPublisher() {    if (!this.publisher) {      this.publisher = createClient({ url: process.env.REDIS_URL })      await this.publisher.connect()    }    return this.publisher  }
  static async getSubscriber() {    if (!this.subscriber) {      this.subscriber = createClient({ url: process.env.REDIS_URL })      await this.subscriber.connect()    }    return this.subscriber  }
  static async getQueueClient() {    if (!this.queue) {      this.queue = createClient({        url: process.env.REDIS_URL,        socket: {          reconnectStrategy: (retries) => Math.min(retries * 50, 1000)        }      })
      this.queue.on('error', (err) => console.error('Redis error:', err))      this.queue.on('reconnecting', () => console.log('Redis reconnecting...'))
      await this.queue.connect()    }    return this.queue  }}
export default RedisManager
5.5 Handling Disconnections and Errors
Redis connections can drop. Your application should handle this gracefully:
export class ResilientQueue {  private client: any  private isConnected = false
  async connect() {    this.client = createClient({ url: process.env.REDIS_URL })
    this.client.on('error', (err) => {      console.error('Redis error:', err)      this.isConnected = false    })
    this.client.on('connect', () => {      console.log('Redis connected')      this.isConnected = true    })
    this.client.on('reconnecting', () => {      console.log('Redis reconnecting...')    })
    await this.client.connect()  }
  async addJob(type: string, data: any) {    if (!this.isConnected) {      throw new Error('Redis not connected')    }
    try {      return await this.client.lPush('jobs', JSON.stringify({ type, data }))    } catch (error) {      console.error('Failed to add job:', error)      // Could implement fallback to database queue here      throw error    }  }}
5.6 Monitoring and Metrics
Track your queue health with monitoring:
export class QueueMetrics {  constructor(private queueName: string) {}
  async getStats() {    const client = await RedisManager.getQueueClient()
    const [queueLength, dlqLength, processing] = await Promise.all([      client.lLen(this.queueName),      client.lLen(`${this.queueName}:dlq`),      client.lLen(`${this.queueName}:processing`)    ])
    return {      pending: queueLength,      failed: dlqLength,      processing,      timestamp: Date.now()    }  }
  async getOldestJob() {    const client = await RedisManager.getQueueClient()    const job = await client.lIndex(this.queueName, -1)
    if (!job) return null
    const parsed = JSON.parse(job)    const ageMs = Date.now() - parsed.createdAt
    return {      ...parsed,      ageSeconds: Math.floor(ageMs / 1000)    }  }}
// API route for monitoring// pages/api/queues/metrics.tsexport default async function handler(req, res) {  const emailQueue = new QueueMetrics('jobs:email')  const uploadQueue = new QueueMetrics('jobs:upload')
  const [emailStats, uploadStats] = await Promise.all([    emailQueue.getStats(),    uploadQueue.getStats()  ])
  res.json({    queues: {      email: emailStats,      upload: uploadStats    }  })}
5.7 Scaling Workers
For high-throughput queues, run multiple worker processes:
import cluster from 'cluster'import { cpus } from 'os'
if (cluster.isPrimary) {  const numWorkers = process.env.WORKER_PROCESSES || cpus().length
  console.log(`Starting ${numWorkers} worker processes`)
  for (let i = 0; i < numWorkers; i++) {    cluster.fork()  }
  cluster.on('exit', (worker) => {    console.log(`Worker ${worker.process.pid} died, restarting...`)    cluster.fork()  })} else {  // Worker process  const emailQueue = new JobQueue('jobs:email')
  emailQueue.processJobs({    'welcome-email': sendWelcomeEmail,    'password-reset': sendPasswordReset  }).catch(error => {    console.error('Worker error:', error)    process.exit(1)  })}
6. When to Use What
Choosing between Redis patterns depends on your use case:
Use Redis Lists (Queues) when:
- You need guaranteed message processing
- Order matters (FIFO)
- Messages should persist until processed
- You need a dead letter queue for failed jobs
- Examples: Email sending, image processing, data exports
Use Redis Pub/Sub when:
- You need real-time broadcasting
- Multiple services need the same event
- It’s okay if no one is listening
- Messages can be lost (not critical)
- Examples: Live dashboard updates, cache invalidation, real-time notifications
Use Both (Hybrid) when:
- You need real-time UI updates AND guaranteed processing
- Events trigger multiple workflows
- Some actions are critical, others are optional
- Examples: Order processing, user signups, payment flows
Consider Upgrading to BullMQ when:
- You need built-in retry logic with exponential backoff
- Job scheduling and delayed jobs are required
- You want job prioritization
- You need better monitoring and queue inspection tools
- Processing thousands of jobs per minute
For background on more sophisticated queue implementations, check out my post on Background Jobs in Next.js, which covers the evolution from simple polling to advanced queue systems.
7. Conclusion
Redis provides powerful primitives for building real-time and asynchronous features. Lists give you simple, reliable queues for background processing. Pub/sub enables real-time broadcasting and event-driven architectures. Combined, they form the foundation for sophisticated systems.
Start with basic patterns - a simple LPUSH/BRPOP queue or pub/sub channel. As your needs grow, add reliability features like dead letter queues and error handling. When you need more advanced features, libraries like BullMQ build on these same Redis primitives.
The key is matching the pattern to your problem. Not every message needs guaranteed delivery. Not every queue needs millisecond latency. Understand the tradeoffs, monitor your systems, and evolve your implementation as requirements change.
Related Articles
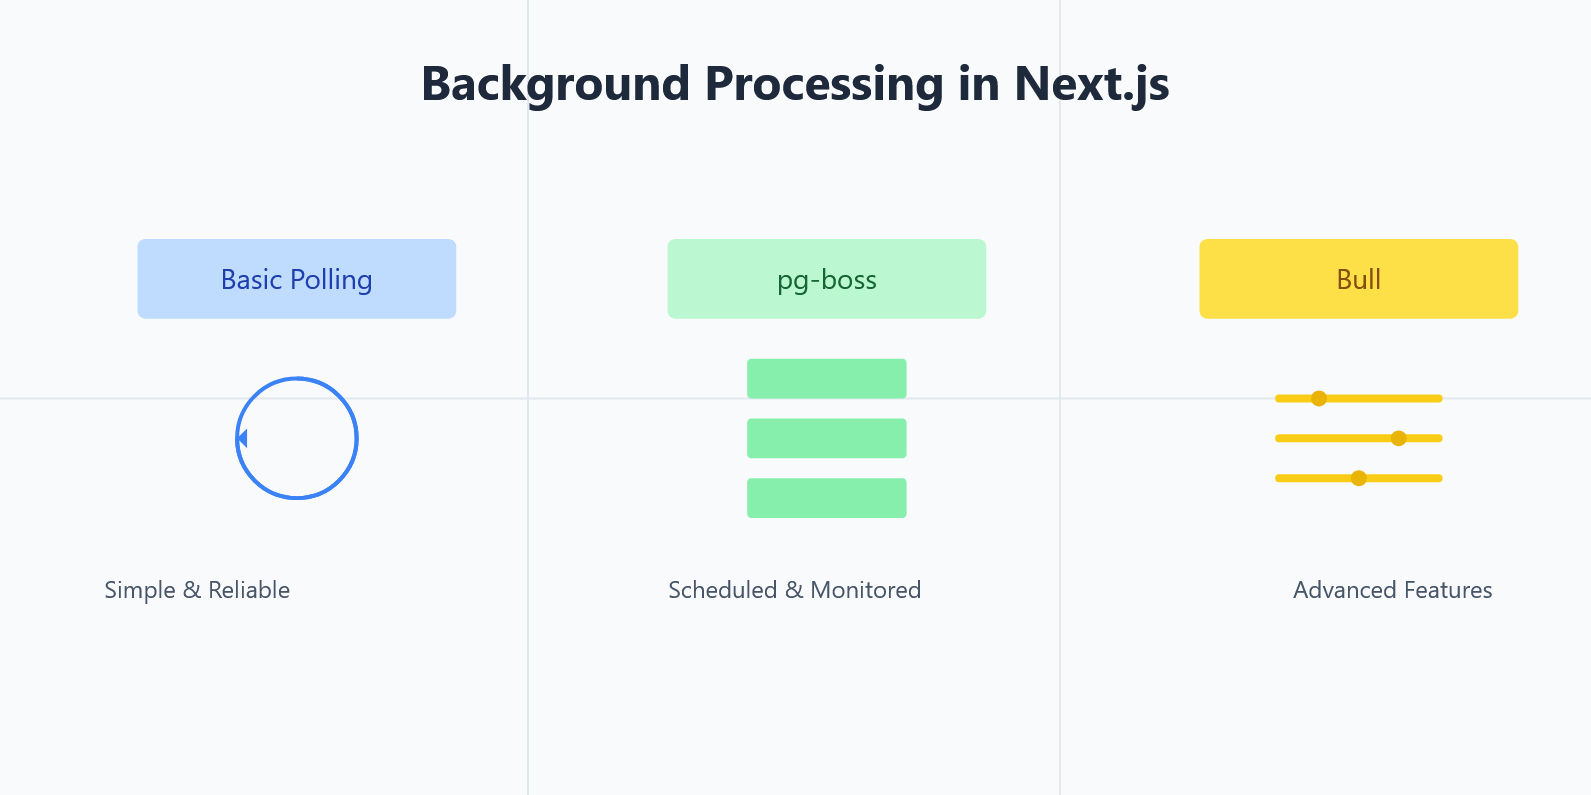
Background Processing in Next.js Part 1
Learn about Background Processing in Next.js Part 1
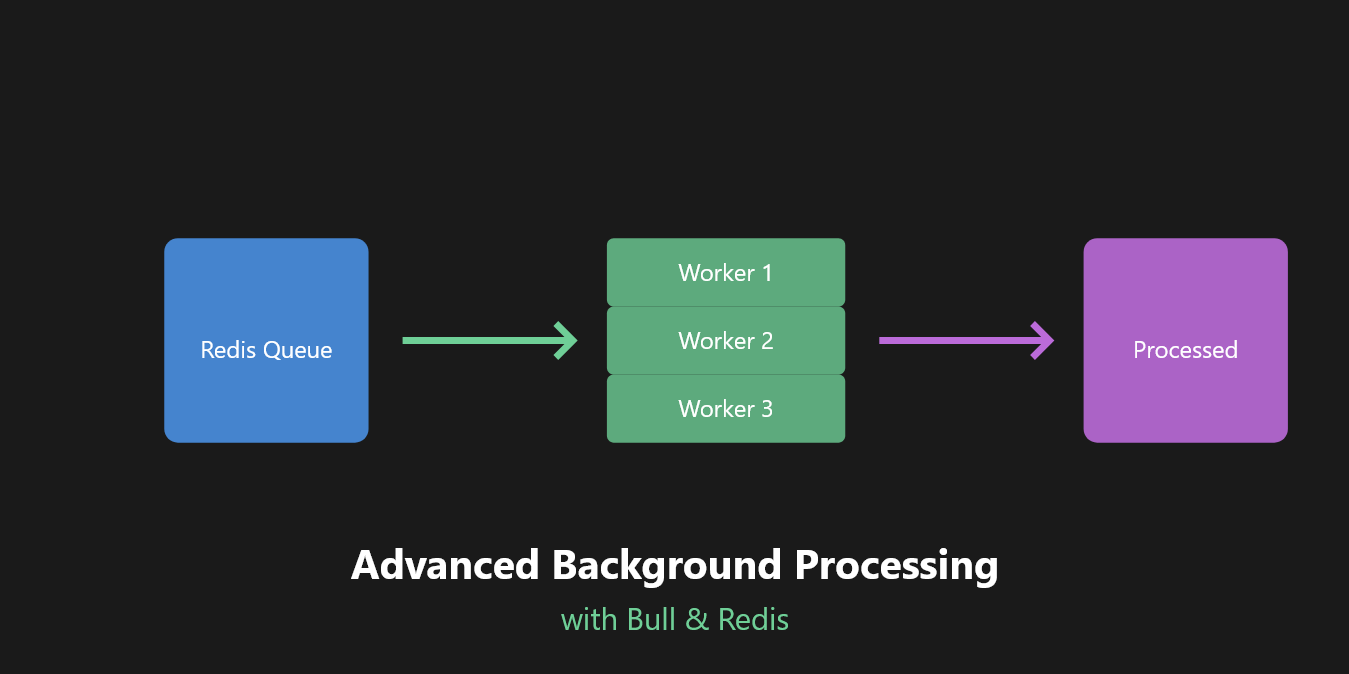
Advanced Background Processing in Next.js Part 2
Learn about Advanced Background Processing in Next.js Part 2
Real-Time Notifications with Server-Sent Events (SSE) in Next.js
Learn how to implement real-time server-to-client updates using Server-Sent Events in Next.js - a simpler alternative to WebSockets for one-way data streaming
From Idea to MVP: Building FastForward IQ with Next.js
Learn about From Idea to MVP: Building FastForward IQ with Next.js